Monday 4 April 2016

ServiceNow Password Reset/Change Application - Part 1

Hey There!

Today I'll tell you how can you use the new password reset and change mechanism that is developed by ServiceNow. It is different from the age-old "Get an E-mail" method.

In this part, we will see how we can reset the password and changing the password will be taken in part 2.

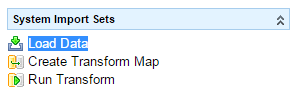
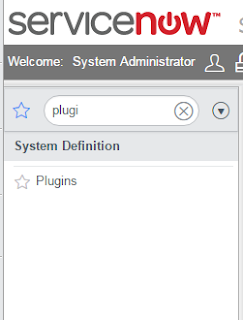
To start, first you need to enable the Password Reset plugin. navigate to System Definition > Plugins.


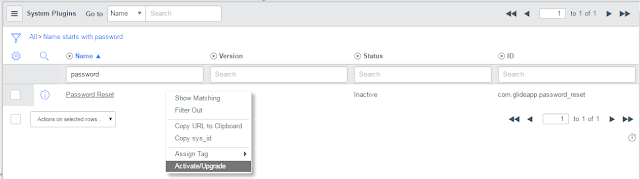
  • Find Password Reset. Right - Click and Select Activate/Upgrade.


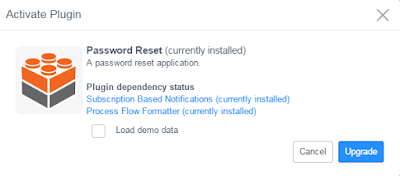
  • Check Load Demo Data (Optional) and click Activate (I am seeing Upgrade because the plugin is already activated in my instance).


Verification Methods

Password reset comes with four verifications. Installing the demo data adds two sample verifications that you can use as a starting point for creating custom verifications:
  • SMS Verification: used with a self-service or service-desk password reset model that relies on auto-generated code numbers.
  • QA Verification: used with a self-service password reset model that relies on questions and answers.
  • Personal Data - Enter User Name: used with a self-service password reset model that relies on information available in the system.
  • Personal Data - Confirm Email Address: used with a self-service password reset model that relies on information available in the system.
  • Sample Mock Verification #1: used to create custom verifications.
  • Sample Mock Verification #2: used to create custom verifications.
(Source: ServiceNow)

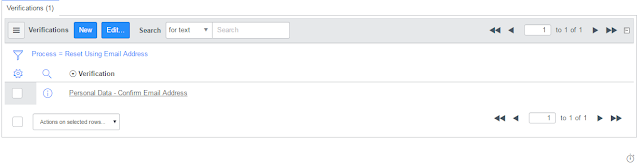
Creating Verification


  • Go to Password Reset > Verifications


There you will see one verification per type to be already created. If you want something other than what you see, click on New and create a verification method of your Needs. Otherwise, go ahead and use one of these.

Specify Credentials Location

Credential Store is a table that stores the user IDs and passwords. The default location is sys_user table.


  • Go to Password Reset > Credential Stores


There's the default store, which is the current instance. You can go through the record if you want. Optionally, you can also create a new store if your passwords reside somewhere else.

Create Password Reset Process


  • Go to Password Reset > Processes

 
  • Click New.
  • Specify a name for your process.
  • Choose Credential Store from the list.
  • Check apply to all users since we are creating a mechanism for all the users not any specific group.
  • Check Password Reset.

If you want, you can use the Advanced Options. There you can specify the following -

FieldDescription
Entry UI macroUI macro that displays a customized message to users when they access the initial password reset screen.
Success UI macroUI macro that displays a customized message to users on the final password reset screen if their password was successfully reset.
Failure UI macroUI macro that displays a customized message to users on the final password reset screen if their password reset failed.
Post reset scriptScript include that performs actions after the password reset process completes whether the outcome is success or failure. For more information on customizing post processor scripts, see the Post reset script category described in Creating Extension Script
(Source: ServiceNow Wiki)

  • From Password Reset Details tab, check Public Access. This will allow the users to access this page without logging in. Specify a URL suffix for your method.
  • Use Identification Type as Email Identification.
  • Right - Click the header and select Save.


  • In the Verifications related list, click Edit and select Personal Data - Confirm Email Address.


The application is now ready to use. :)


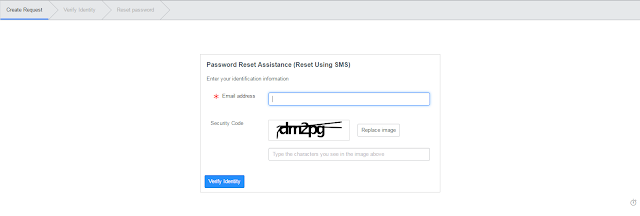
  • Go to the URL you specified in process.


  • Enter the Email address of the account you wish to reset the password of and the captcha characters.


  • Click Verify Identity.


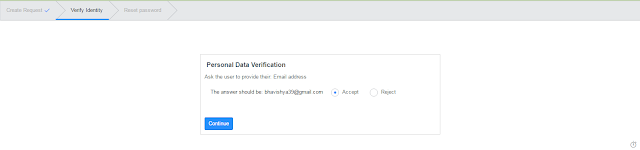
We have not configured the verification method as of now. The default process asks the user to confirm their Email Address by clicking Accept or Reject. This can be used for users with no special permissions otherwise can cause misuse.


  • Select Accept and click Continue.


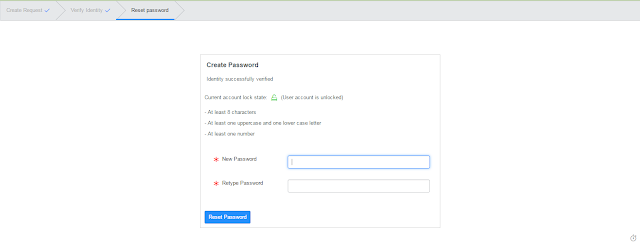
On this screen, the user can choose a new password for herself as per the guidelines mentioned.

You will get a successful screen at the end.


 The password will be changed with immediate effect and the user can then login to their account using the new password.

Ans that's It!!! I'll tell you how can we configure changing password this way in the next part.

Feel free to post your queries in the comments section :)

Wednesday 30 March 2016

Using Google Maps API with ServiceNow

This post summarizes the process of using Google Maps API with ServiceNow. With the withdrawal of NPAPI API, the Google Earth plugin went out of the market. To combat the situation, we used Google Maps Satellite view to provide almost the same image.
The points defined are –
  • Using Google Maps API with SNOW
  • Extracting Attachment Data to Table
  • Using Markers and Overlays
  • Setting up the data on the map


Over six years ago, Google has introduced the Google Earth API enabling developers to build rich 3D mapping applications in the browser using JavaScript. And over the years, developers have built quite a number of fascinating applications.
However, the Earth API is built on a technology called the NPAPI plugin framework, and recently, for security reasons, both Chrome and Firefox have announced that they’re removing support for this framework. These security reasons, combined with dwindling cross-platform support (particularly on mobile devices), had made building applications that leverage the Earth API untenable for developers.
Therefore, Google decided to retire the Google Earth API. The API was supported for one more year and then turned off on December 12, 2015.

Due to this reason, all the existing reports which were using Google Earth API will no longer be functional now. We have to come up with an alternative.


Without NPAPI plugin framework, we cannot have Google Earth. Chrome are Firefox are leading browsers and are extensively used by almost everyone so we cannot take the risk of not supporting these browsers. Also, we cannot guarantee that for how long other browsers will keep on supporting this plugin.
ServiceNow was facing the same issue. We can have map – based reports in ServiceNow as well and many people can have it using the Google Earth API. All that would have stopped working.
We had such reports as well. These reports are used to show the statuses or coverage zones of various sites planted at different geographical regions.

Below is a screenshot of the earlier Google Earth view.

 
These reports have to be map – based to provide a clear picture of the areas and regions. This Google Earth plugin uses a KML (Keyhole Markup Language) file with the plotting data in it being similar to XML tags to plot the images on Map with the desired shape and size. It contains the east, west, north and south point coordinates where the four corner lies and Google Earth plots them in the same fashion.


To combat the situation, the alternative we are using is the Satellite view of Google Maps. This is quite similar to the Google Earth view but it is not a three – dimensional view. We can use the same KMLs for plotting the data by fetching their data to a table and passing that data to the Google Maps API functions.
The KML file was present as an attachment to a particular table record. We fetched the data from that KML to a SNOW table using XMLHelper. XMLHelper is used to fetch data from XML files and since the structure of a KML file is similar to an XML file, we can use the same for KMLs as well. Below is the code snippet used –

getParametersFromXml: function(soapRequestXML, nodeBody ) //soapRequestXML is the complete string in KML and nodeBody is the parent tag
{
                        var soapObject = new XMLHelper(soapRequestXML).toObject();
                        this.getRecordObj(soapObject, nodeBody);
                        return this.recordObject;
            },
           
            getRecordObj: function(obj, requestBodyElement){
                        for (x in obj){
                                    if(x==requestBodyElement){
                                                this.recordObject = obj[x];
                                    }
                                    this.getRecordObj(obj[x], requestBodyElement);
                        }
            }
Once you have the returned value from this function, you can dot – walk on it to reach your particular tag whose value is desired.

This way, the data can be stored in any desired SNOW table per tag. Every row in that table will contain a marker to be plotted on the map.

Now, we will actually plot the data on map using Google Map API functions. For that, we will need an array of all the markers that need to be plotted. In our case, we had different checkboxes and dropdown menus to choose the report to be displayed. Hence, there was different set of markers for every selection. We created a GlideRecord of all the records in the table that are to be plotted and created an item out of it. Below is the code snippet used –

var markerArray = this.newItem("marker"); //Create an array and name it marker
favs.setAttribute("name", gr.u_ name); //Set the values you need

Now, we will fetch this array in our UI page and plot the values on the map. This functionality is provided by various functions in the API according to various needs. The one we used was OverlayView and Marker. First we created the map –

myMap = new google.maps.Map(document.getElementById('map'), {
                        zoom: zoom,
                        center: goldCoast,
                        mapTypeId: mapType
            });

This map object must be global since we’ll be using it at various points. Next, below is the code to create an OverlayView.

DebugOverlay.prototype = new google.maps.OverlayView();

function DebugOverlay(bounds, image, myMap) { //bounds is an object of google.maps.LatLng type which contains Latitude and Longitude value separated by comma, image is the reference of the image to be plotted and myMap is the reference to our map object
           
            this.bounds_ = bounds;
            this.image_ = image;
            this.map_ = myMap;
            this.div_ = null;
            this.setMap(myMap);
}

//Below are the various functions which will be called at different times by the constructor and destructor
DebugOverlay.prototype.onAdd = function() {
           
            var div = document.createElement('div');
            div.style.borderStyle = 'none';
            div.style.borderWidth = '0px';
            div.style.position = 'absolute';
            var img = document.createElement('img');
            img.src = this.image_;
            img.style.width = '100%';
            img.style.height = '100%';
            img.style.opacity = '0.20';
            img.style.position = 'absolute';
            div.appendChild(img);
            this.div_ = div;
            var panes = this.getPanes();
            panes.overlayLayer.appendChild(div);
};

DebugOverlay.prototype.draw = function() {
            var overlayProjection = this.getProjection();
            var sw = overlayProjection.fromLatLngToDivPixel(this.bounds_.getSouthWest());
            var ne = overlayProjection.fromLatLngToDivPixel(this.bounds_.getNorthEast());
            var div = this.div_;
            div.style.left = sw.x + 'px';
            div.style.top = ne.y + 'px';
            div.style.width = (ne.x - sw.x) + 'px';
            div.style.height = (sw.y - ne.y) + 'px';
};

DebugOverlay.prototype.updateBounds = function(bounds){
            this.bounds_ = bounds;
            this.draw();
};

DebugOverlay.prototype.onRemove = function() {
            this.div_.parentNode.removeChild(this.div_);
            this.div_ = null;
};

To create the markers, the point where we are to show the image on one particular coordinate and not over an area, we can use the below code –

function addMarker(location, icon, title, disp) { //
            var marker = new google.maps.Marker({
                        position: location,
                        map: myMap,
                        icon: icon,
                        title: disp
            });
           
            if(title != '') //create a popup dialog showing the relevant information
                        {
                        var infowindow = new google.maps.InfoWindow({
                                    content: title
                        });
                        marker.addListener('click', function() {
                                    infowindow.open(myMap, marker);
                        });
            }
           
            markers.push(marker);
}

We can use Google Maps API over SNOW to create map – based reports using list data. To show the markers we need the longitude and latitude of the point and to create an overlay, the east, west, north and south points are required. You can control the type of map from Satellite, Terrain or Hybrid, the zoom – level and the center of the map on load. The data can be refreshed into the table itself to update. There is so much more in the API that can be used as per the requirements.

This can help users to demonstrate any location – based reports and findings.


  1. https://developers.google.com/maps/documentation/javascript/examples/
  2. http://gmaps-samples-v3.googlecode.com/svn/trunk/map_events/map_events.html
  3. https://community.servicenow.com/thread/154141
  4. http://tuhrig.de/visualizing-kml-files-in-google-maps/

While every effort has been made to provide all the information and the correct things, please feel free to reach out in case you find any issues or need further information. :) :)

Monday 28 March 2016

Document ID field in ServiceNow

Hey There!

Today we'll discuss an interesting thing provided by ServiceNow. At times we need to specify a reference column without knowing what will the table be. It might be an Incident to refer, or a change, or some other user defined table. But our very own reference field doesn't let us do that.

For that, ServiceNow has provided as the Document ID field. A Document ID field is of two types -

1. In which we can let the user specify the table name in another column created by us - known as Dependent column.

2. A field in which we have a table and a field drop-downs to choose from.

I'll show you how.

USING DEPENDENT COLUMN


First, we will go to the table where we want the Document ID field. Create a column of type Table Name with your choice of name. This will be used as the dependent column where the user will specify the table name to reference.

Next, create a column of type Document ID. Save it. Under the column Dependent Field, check the box Use Dependent Field. Under the drop down Dependent on Field, choose the field you created for table name to reference.


And...its done :) ...when you'll go ahead and add a new record to the table you'll be required to add the table name and then you can go ahead and choose the record from that particular table to refer to.


Without using the Dependent Column

Just don't check the column Use Dependent Column and add the values by selecting the table and record.

Feel free to post any queries under the comments section :)

Monday 7 March 2016

Selective Hiding: Domain Separation for List Data

Domain separation is the technique by which we let users view only a selective range of data. The data visibility is defined by the domain in which the user is residing and we add a similar column to our concerned table as Domain. The filtering is done by ServiceNow by matching the domains and letting a user view only the data that falls into his domain,

For this, what we may do as an advanced step is separating the users based on their company and adding a Company field in our table which will decide the domain view. I'll tell you how!!

First, create a column named domain....do not save before you read this fully. Column type will be Domain as well. Change the column name from u_domain to sys_domain before you save anything.

After you'll save, ServiceNow will create a column named Domain Path for its reference. Now, all you need to do is convert your Company name to Domain. For this, we will be writing a Business Rule which will run before Insert and Update.

Below is the script you need to add in Advanced tab -

var defdomain = current.u_company; //the value from company field - sys_id since it is a ref field
var chgdomain = ""; //variable to store domain value

var compcheck = new GlideRecord('core_company');
compcheck.addQuery('sys_id', defdomain); //find the record of the company
compcheck.query();
if (compcheck.next()) {
chgdomain = compcheck.sys_domain.getDisplayValue(); //get the domain value from company table
}

updatesoftdomain();
function updatesoftdomain()
{
current.sys_domain = chgdomain;
current.update();
}


Done Done Done...!! :)

Monday 22 February 2016

ServiceNow Import Sets and Tables - Fetching data from Outside Sources

You were using age old CSVs or Excels to save your data. Now you come to know about ServiceNow and started using that for your service management needs. What about the huge data I already have??

One way is to manually enter the data into a SNOW table. But that is not feasible if the data is very large.

Second option can be to create a record in the new SNOW table and attach the file there.

If either of these option doesn't suit you what you need is an Import Set table.

An Import Set gets the data from the specified file and inserts it into the target table as manually entered records.

To create an import set, first go to System Import Sets > Load Data.


Supply the name of new table as desired and upload the .xls or .csv file you have. Generally the header field is Row 1, but change it if this is not the case for you. In case of multi-sheet excel, please supply the sheet number to be imported as well.


Click on Go and wait for it to upload successfully.


Now you have the data in the table name you provided in the earlier step. If you want you can go and do a sanity check.

Next, we need to move the data to our desired table. For that, we will create a transform map to specify the field mapping and to apply the transformations, if any.

Click on Create transform map from Next steps....


Name your transform map and specify the target table. Click Save.

You will see the Field Map related list at the bottom of the page. Field Maps specify the mappings between individual fields. If your source data and target table have the same header, you may try using Auto map matching fields link from the Related Links. Otherwise, click on New.


Specify the Source and Target Fields here and create one per field you want to map.

And...you are done!

Please comment for any issues/suggestions. Tada!! :)